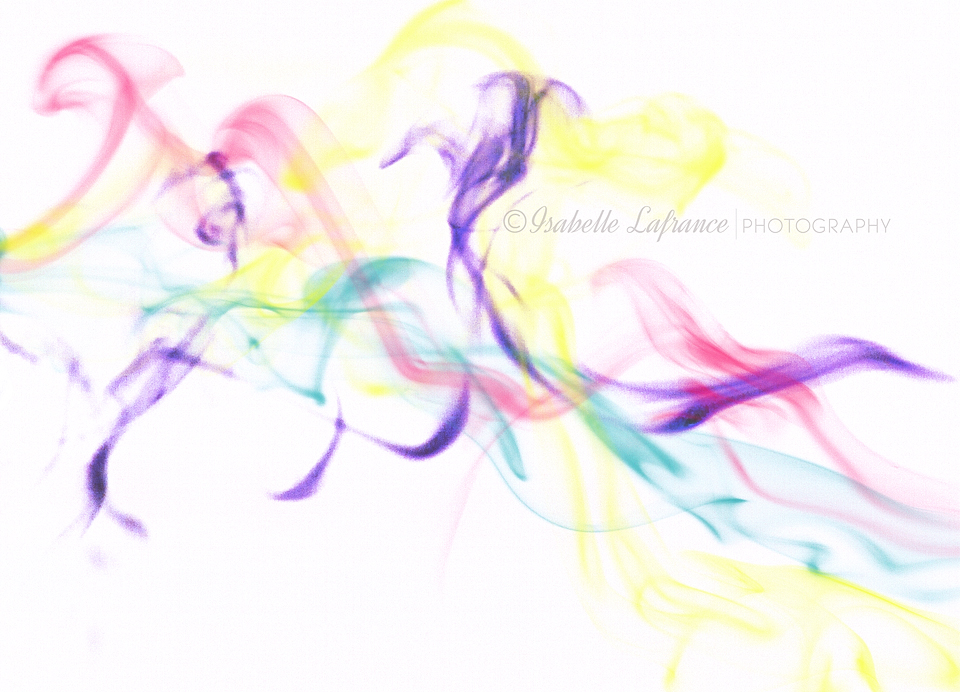
I’ve done smoke photography in the past, but never went further than capturing it and converting one image to a decent smoke trail. This time around I wanted to combine different smoke trails in one image. I loved the result so I decided to share the tutorial with you guys!
What you’ll need:
Camera (with pop-up flash activated or a speedlite to capture the elusive smoke)
Incense sticks
A large room with a black background, or a black studio box kit if you plan on doing it inside. I did it outside, at night, the smell of the dollar store bought incense was too strong to have it inside. If you plan on shooting outside, choose a night without wind!
Capturing the smoke is not that hard given you have good conditions. Inside, a black background, your incense sticks not too close to the background, otherwise the flash will light it up too much and you’ll have a washed out background. Be careful where your speedlite bounces too, it could add up a lot of unwanted light. Outside, at night, no wind. Direct your camera at a wide space (sky is perfect) so your flash doesn’t pick up anything in the background.
My camera settings: 160, f/7.1, iso 200 (raw files, cloudy white balance)
Focus on the incense stick, I like to keep a small part of it in the image, you probably won’t see the smoke anyway, the flash will pick it up. It helps to focus and compose the image. I used two incense sticks, one works fine as well, I just thought I’d have a wider trail. Make sure you have the right aperture, 7.0 and up, since you never know where the smoke will be, you want to have the most you can in focus. Photo below shows the incense sticks in the frame, smoke was enhanced in Camera Raw, I could see it on my LCD screen, but since the LCD is brighter and compressed, when I did open the RAW file, smoke still needed a good boost. Incense sticks are now blown, but we’ll get rid of them anyway!

Shoot away! Look at your images from time to time, sometimes a light breeze will make your smoke leave the frame. You’ll need to take more than a few images to get a bunch of trails you’ll want to keep.
Once you’re happy with the amount of images you have, it’s now time to edit them.
I work in Camera Raw & Photoshop.
I used a Raw image, so I opened every image with Camera Raw, in which I reduced the blacks, added exposure and fill light so my smoke was exposed in such a way I would see all the little swirls. I also cropped my incense out right in Camera Raw and kept only the most interesting part of the trail. Do the same if you’re using LR.
If you are not using Camera Raw or LR, open your image and use a Curves or Levels adjustment layer and adjust until the smoke comes out. Once done merge the layers so you’re left with one Background layer. **Elements users, well, we do need to work with layer masks to remove all the background, you could opt for a selection of the smoke and use the Background Eraser tool to remove the background. Once done you can play with the Hue and change the colors of the smoke. Add your smoke trail to a new document and repeat, just like we will be doing in Photoshop**
In Photoshop
1- Select the image and cut it into your clipboard (Ctrl+A to select then Ctrl+X to cut). This should leave you with an empty layer and the smoke image stored in your clipboard.
2- Add a new layer, add a layer mask to this new layer.
3- Alt+click on the layer mask to edit the mask and then paste (Ctrl+V) the contents of your clipboard into the mask.
4- It should paste your image in the mask with the smoke white and the background black.
5- Get out of your layer mask and now the smoke should be completely cutout. It’s hard to see, but you’ll have to trust me with this one! Turn off the background layer and go back to the new layer. Fill this layer (Edit > Fill) the color you’d like to have your smoke.
Since your smoke isn’t perfectly white and your background perfectly black, a tint may show on the background. You can easily fix that later when you’re done playing.
Create a new document the size you want, I went with the size of my first cropped image. Drag your first layer of smoke into this new document, place it the way you want it.
Repeat all those steps for every layer of colored smoke you want to add if you plan on working with different smoke photos. You can also use the same image and just fill the colored layer with different colors and add them to the new document, flip them, stretch them, play around with them so they look like different smoke trails! Or you can use different smoke photos, edit them and add them to the document one by one.
When you’re done, now fix the color tint in the background in the new document. To do so, add a Levels adjustment layer and use the white dropper and select a point in the background which should be white. It will clear up right away. Save your project. That’s it, you’re done!
I hope you enjoyed this tutorial, if you try your hand at smoke photography and want to share your work, don’t hesitate to post your results on the Facebook Page!


Leave a Comment