
I was inspired this week by some posts I had seen on Facebook about bubbly photography. I read the tutorial and decided to add my own twist to it. Not that the tutorial wasn’t clear enough, just that I had another idea I wanted to try and since it worked, well I’m sharing now my own version.
What you’ll need is pretty simple. A clear glass container, preferably with flat surfaces, like a square vase, I used an old fish bowl. You will also need sparkling water, any regular carbonated water will do. Make sure it’s not a sugared one, it will get sticky. And a lens that allows you to get close enough.
If you feel like adding a colorful background, you can use your favorite scrapbooking paper and place it behind your vase. The photos I will post have a white background, but that was my choice.
Select some items you want to drop in the bubbly water, fruits (not too juicy or they will make the water murky). I had great results with a strawberry, slices of apple or lemon and grapes. Cherries work great too! That was for the fruits. I also tried toys, everything I had on hand that I thought would make a fun bubbly image.
You could use a toothpick to fix your fruit at the top of your vase, that works fine. But part of your fruit will remain above the surface. You can also fix your fruit to a styrofoam base so it remains underwater, this method works fine as well, but you will see the styrofoam in your image.
My challenge was to capture my fruits under water, but I didn’t want to have them fixed on a surface at the bottom. I didn’t want to have them floating at the surface with part of them above the surface either. I wanted to see the whole fruit. So my idea was to tie a broken in half toothpick with a small length of fishing filament to a small metal object that would sink and keep the fruit in place under the water ( like a couple of washers or a large nut). And that’s what I did. I inserted the small piece of toothpick inside my strawberry, where the stem was, and dropped the piece of metal at the bottom. It worked great with the strawberry, a peach, quartered, a thick slice of apple or kiwi, etc. That also prevented my fruits from moving around my bowl due to the bubbles. My main concern was that the filament would also get covered in bubbles and the line would show. It didn’t happen. You can’t see the filament! So all I’m left with is a complete fruit, covered in bubbles.
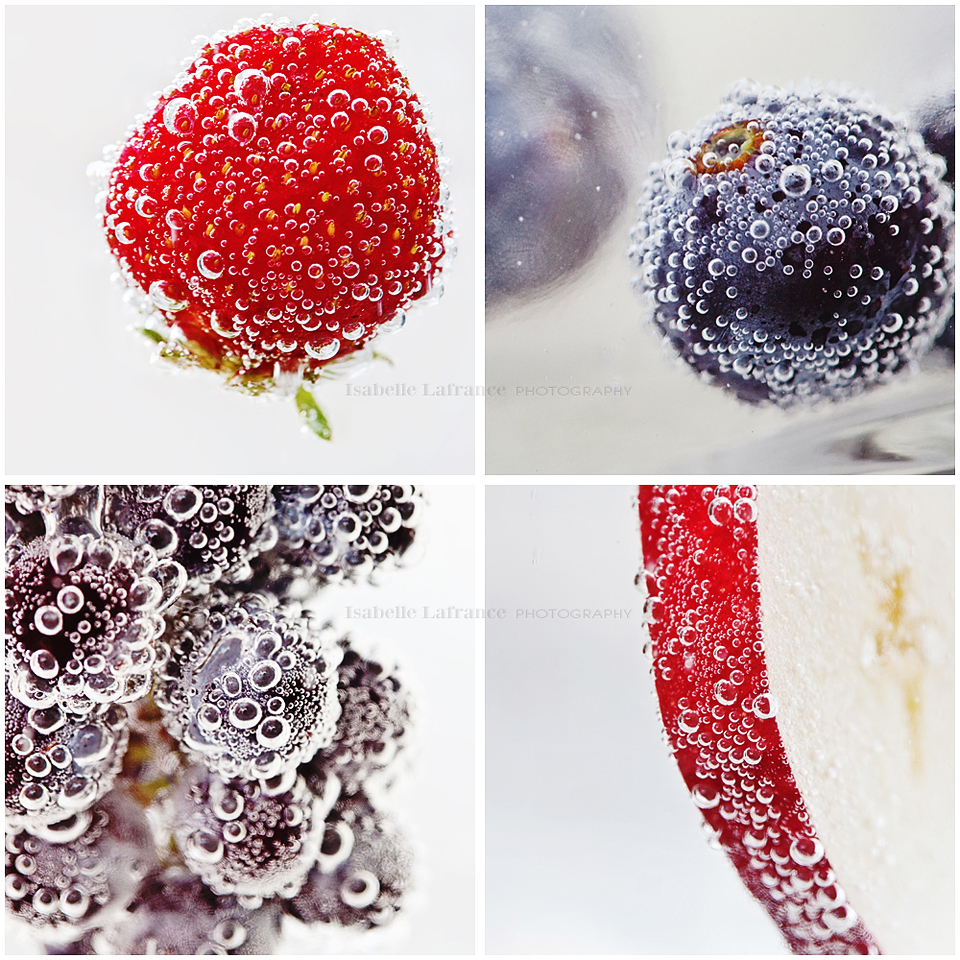


Since my trick worked, I thought it would be great to share it with you. Now it’s your turn to try it! If you do try it and want to post your results on my Facebook page feel free to do so!








love how fresh these look!…
i tried this with a rose a long time ago with a point and shoot camera…lol… it’s quite fun!
Love it!! Thanks for sharing
I love this idea and thanks for the tips on how to do it. This is going to be my Labor Day photo project. 🙂