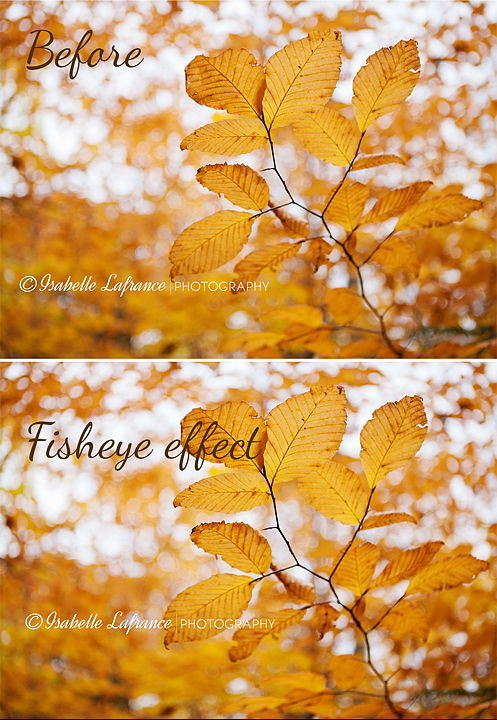
In a fantasy world, I would own a fisheye lens, but reality is, I don’t. So, whenever I want a little fisheye effect in my images, I have to rely on Photoshop (It will work in PSE too). Here’s my photo, before and after the Fisheye effect.

You will notice, in this image, my Fisheye effect is subtle. Sometimes too much is just too much! But once you know how to do it, you decide on how strong the effect fits your image. Remember, it is PS, not the actual lens, so it’s not as perfect, and like any editing tool, it needs to be used with moderation, but the effect is fine enough to use it every time you need!
So, let’s start with the actual steps you will need to take, it’s pretty simple actually, but it’s just a feature we tend to overlook, and we might not notice if we do not look for it.
In PS, duplicate your background layer, then select all. Right-click and select > Free Transform. Once that Free Transform tool is activated, you get access to the Warp tool, that’s what we need! So, once you’ve clicked Free Transform, right-click again (or use the top menu bar to access the feature, under Edit > Transform > Warp) and select the Warp tool. On the top of your workspace, you will see the Warp menu, it’s set to Custom. Click on it to develop it and select Fisheye. It’s set by default to a value of 50. It’s pretty strong actually, but depending on your image it could work just fine. All you need to do at this point is click the check mark, after you have adjusted the value. Working on a duplicate layer makes it easier to get rid of and start over again if you find the effect too weak or too strong. That’s it! You just needed to know where to find the right menu for the tool!
In PSE, duplicate your background layer, then select all. Next go to Filter > Distort > Spherize. Enter the value there, it’s basically the same tool, but it has a different name.


Cool…thanks for sharing!
Thank you so much. What fun this will be to play with .
Thanks a bunch! 🙂
. Thank you . I love the actions . Love your new Header also.
xo